

You're on a client call, you've barely started your update, and someone interrupts with, “There's a lot of echo. Are you on a headset?” That comment usually sends people straight to shopping for new gear. Most of the time, that's the wrong first move.
On business calls, bad audio rarely comes from one thing. It usually comes from a stack of small problems piling up. The room is reflective. The mic is too far away. Noise suppression is off, or enabled twice. The VoIP app is listening to the laptop mic instead of the headset you plugged in. If you want to know how to reduce background noise, fix it like a system, not like a gadget problem.
Why Your Call Still Sounds Noisy
A noisy call usually starts before the call starts. You sit at the kitchen table because it's convenient. The hard counter reflects your voice. The dishwasher hums. Your laptop fan ramps up. Then your webcam mic, sitting a couple feet away, captures all of it with equal enthusiasm.
That's why “I bought a headset and it still sounds bad” is such a common support ticket. A headset can help, but it can't undo a loud room, aggressive mic gain, missing echo cancellation, or the wrong input device.
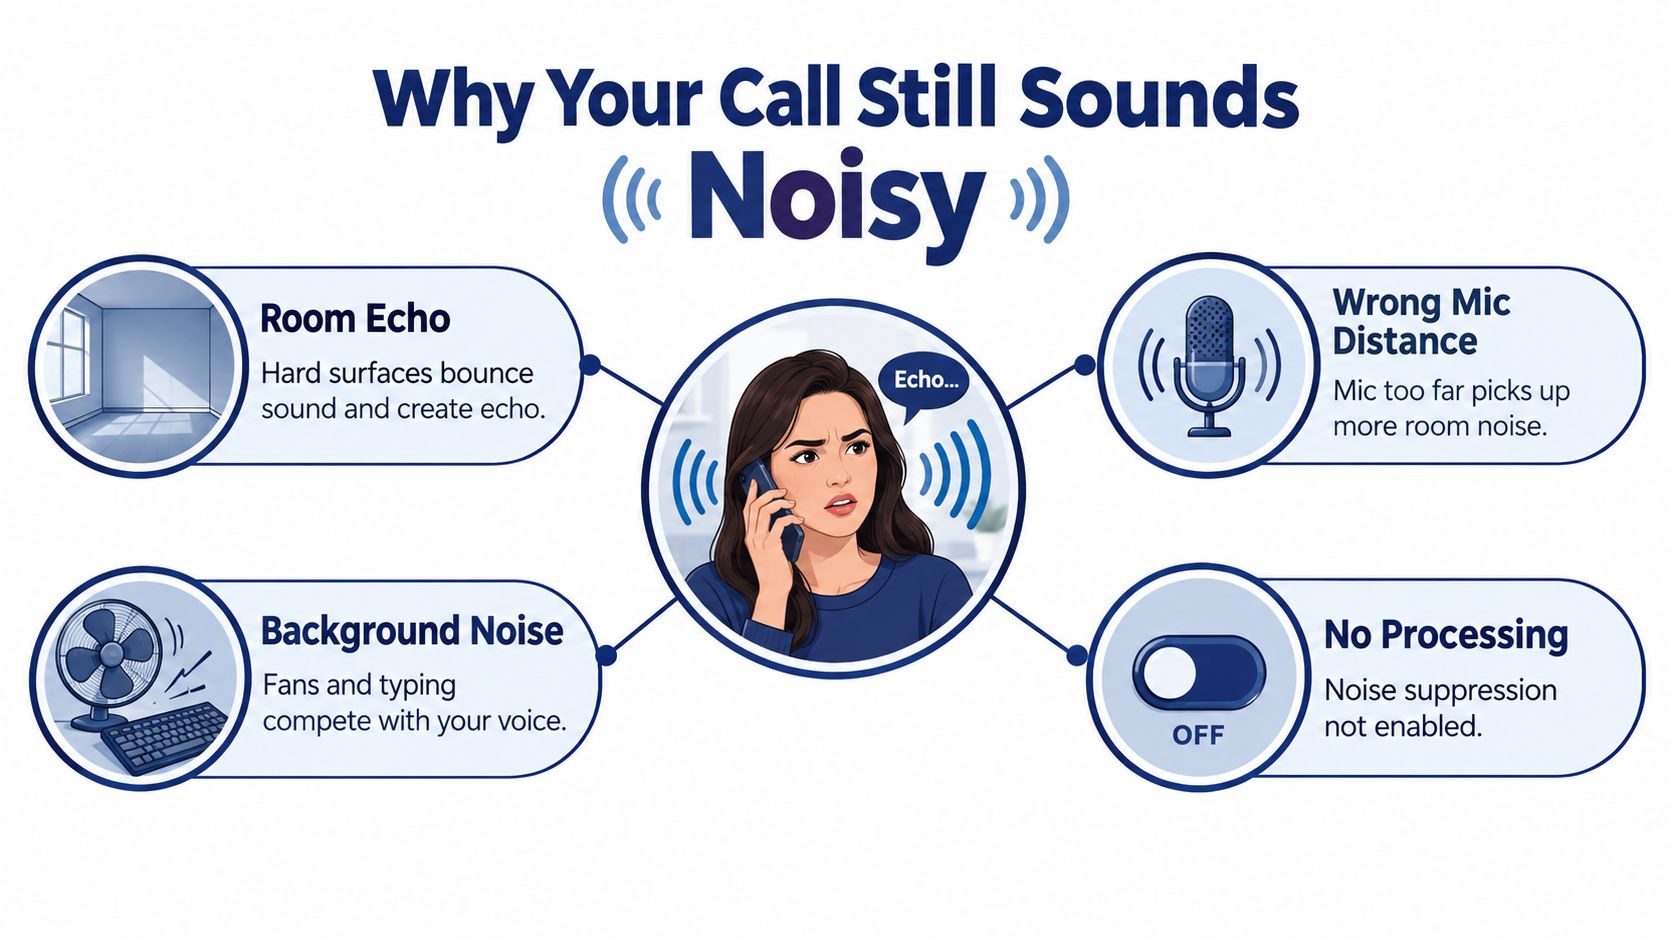
The four layers that decide call quality
I treat call noise as a four-layer problem:
- Room: HVAC rumble, outside traffic, bare walls, shared spaces, appliance noise
- Microphone: built-in laptop mics, webcam mics, poor boom placement, too much gain
- Software: operating system filters, third-party suppression tools, conferencing app settings
- Platform: echo cancellation, audio processing, and device selection inside the VoIP client
If you only fix one layer, the others still leak through.
Why this matters in real work
Hybrid teams run into this more than they expect because the workplace itself is often the issue, not the speaker. Recent coverage cited by the Chartered Institute of Environmental Health notes that 63% of UK office workers in one 2026 survey had worked from home at least once to escape office noise, and it also notes a gap in fresh national survey data as of March 2025, which leaves employers with less current guidance on redesigning acoustics rather than telling people to just mute more often (CIEH summary and discussion).
Practical rule: If the far end hears your room, changing brands won't save you. You have to reduce what reaches the mic in the first place.
There's also a useful benchmark for what “quiet enough” means. The WHO's community-noise guidance says background noise should not exceed 35 dB(A) for clear speech perception, and for sleep protection, continuous indoor noise should stay at or below 30 dB(A), with single events ideally under 45 dB(A) (WHO summary). You don't need a lab setup to use that idea. You just need to stop treating “quiet” as a guess.
Fix the Room Before You Fix the Mic
If your room is loud or echoey, every other fix is working uphill. Software can reduce some steady noise. It won't make a tiled kitchen sound like a treated office.
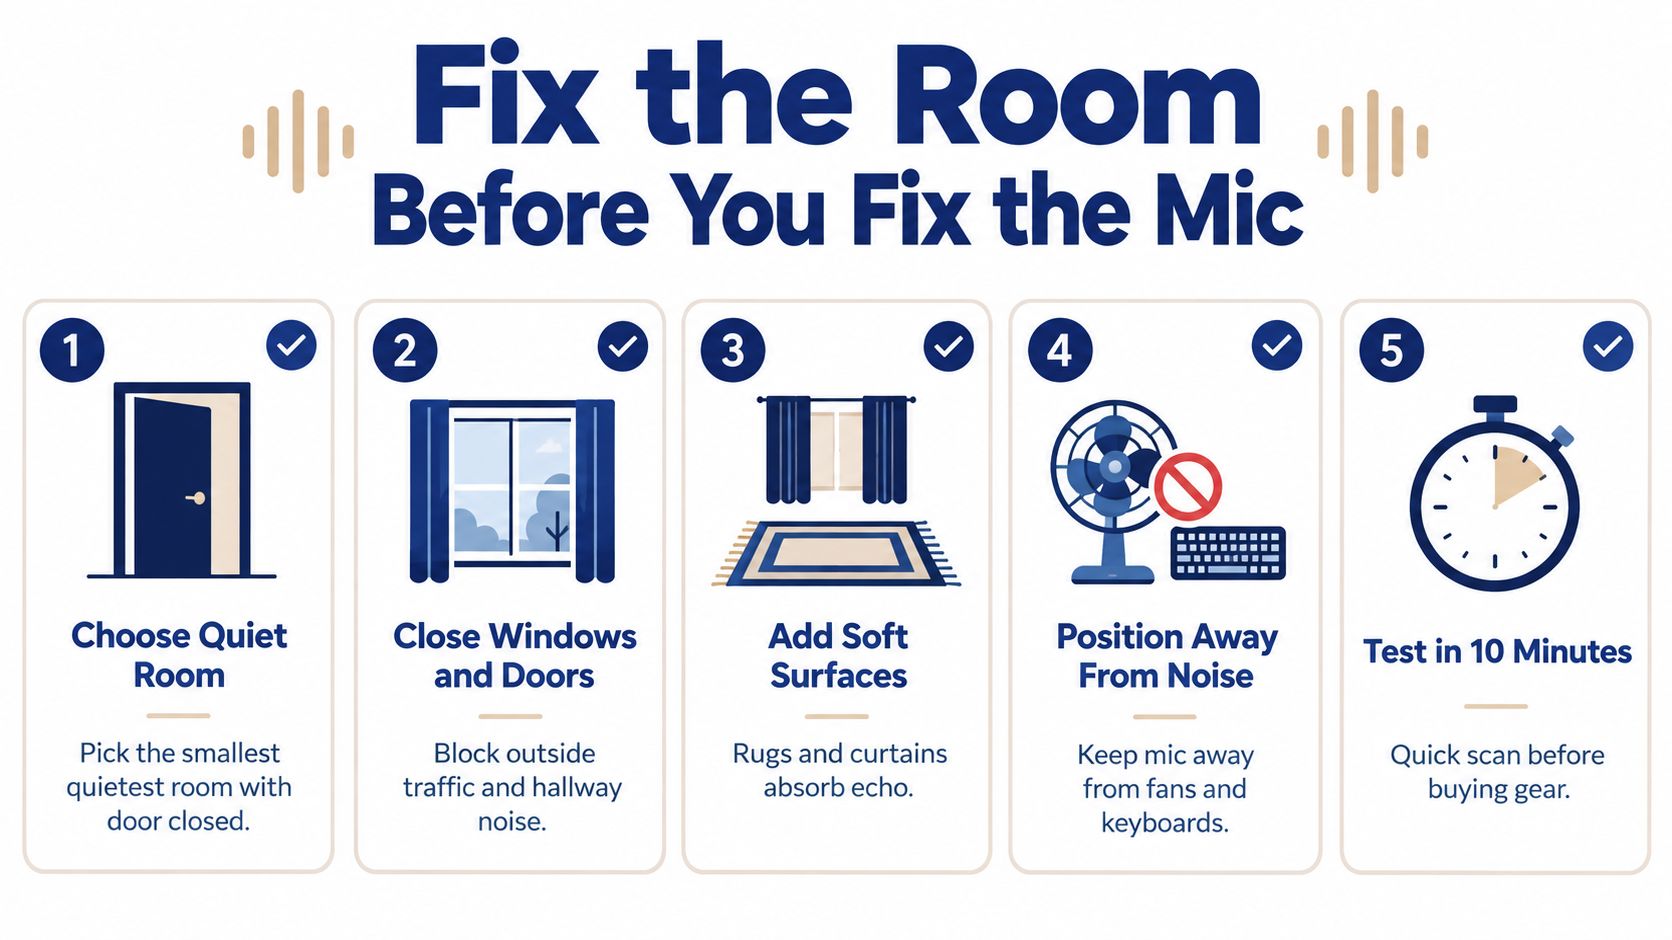
A ten-minute room check
Run this before you spend money:
- Pick the smallest quiet room you have: Smaller rooms with a door usually beat open living spaces. Less open air means less spill and fewer reflections.
- Move away from windows and vents: Windows bring in traffic and neighborhood noise. Vents add a low whoosh that callers notice faster than you do.
- Break up hard surfaces: Curtains, rugs, upholstered chairs, and full bookshelves absorb reflections. If you've been meaning to add window treatments, these noise reducing blind options are a useful starting point because they address both outside noise and slap echo from bare glass.
- Silence nearby alerts: Phones, tablets, smart speakers, and desktop notifications ruin otherwise clean calls.
- Close the door every time: Consistency matters more than people think. The same room can sound completely different with the door open.
What helps more than people expect
Soft surfaces do more work than premium hardware in a bad room. Bare walls throw your own voice back into the mic. That's the “hollow” or “bathroom” quality people call echo, even when there isn't literal electronic feedback.
A few practical setups that work:
- Permanent home office: Put the desk off the wall, not jammed into a corner. Keep the mic side away from a vent.
- Temporary setup: If you're at a dining table, hang heavy fabric nearby and avoid facing a window.
- Tough environments: Closets full of clothes can sound surprisingly good. Parked cars can work in a pinch because the cabin is padded, but only if the engine and climate system are off.
- Conference spaces: If your team is outfitting a shared room, the physical setup matters more than menu settings. This guide to conference room setup is useful because it gets into placement and room behavior, not just what gear to buy.
The room is the first filter. If the room is wrong, every mic hears the same bad story.
What doesn't work
People try to “fix” room noise by speaking louder, turning mic volume down at random, or buying pricier earbuds. None of that changes the reflections bouncing around the room. A bad room is still a bad room. It just gets captured differently.
Choosing a Headset or Microphone That Actually Helps
A lot of noisy call setups fail for a simple reason. The microphone is too far from the speaker, so the system has to turn up everything, including HVAC, keyboard noise, hallway chatter, and room reflections.
For remote support teams, outbound reps, and managers who spend hours in SnapDial or any other softphone, a headset with a boom mic is usually the safest choice. It gives the software a cleaner signal before noise suppression ever starts working. That matters because noise reduction works best as a stack. Room first, then mic position, then software settings, then the VoIP platform.
Built-in laptop and webcam mics are the weak point in that stack. They sit too far away and they capture too much of the room.
What each mic type is good at
Here's the practical version.
| Microphone Type | Noise Rejection | Voice Clarity | Typical Cost | Best For |
|---|---|---|---|---|
| Wired headset with boom mic | High | High | Low to medium | Call-heavy users who want fewer variables |
| Wireless headset with boom mic | High | High | Medium to high | Users who need to stand, pace, or step away briefly |
| USB dynamic desktop mic | Medium to high | Very high | Medium to high | Fixed-desk users who will place it correctly |
| USB condenser desktop mic | Low to medium in untreated rooms | Very high in good rooms | Medium to high | Quiet private offices with controlled acoustics |
| Webcam microphone | Low | Low to medium | Included | Occasional calls only |
| Laptop built-in microphone | Low | Low to medium | Included | Backup only |
If your team uses desk phones or a hybrid desk-phone and softphone setup, check compatibility before buying. This guide to choosing a headset for Yealink phone is useful because connector type, call controls, and mic placement all affect day-to-day call quality.
What actually wins in real use
For voice calls, mic distance beats brand prestige. A modest headset with a boom mic close to the corner of your mouth will usually sound cleaner than a premium desktop mic sitting across the desk.
Single-ear versus dual-ear comes down to workflow. Single-ear works for front-desk staff or anyone who needs to hear people in the room. Dual-ear helps focus, cuts distraction, and often stops users from raising their voice to compete with background noise.
Wired versus wireless has a real trade-off. Wireless gives people mobility, which is useful in long call blocks. It also adds battery management, Bluetooth handoff problems, and another place for audio quality to go sideways. When a user tells me their audio sounds fine on one call and washed out on the next, I check wireless switching and device selection early.
When a desktop mic is the right call
A USB dynamic mic makes sense for a fixed desk, especially for users who stay put and want stronger voice presence. It rejects room noise better than a condenser, but only if it stays close to the mouth. If it ends up a foot or two away so it looks cleaner on camera, the advantage disappears fast.
Condenser mics are less forgiving. They can sound excellent in a treated office and terrible in a reflective spare bedroom. They pick up detail, which includes the detail you do not want.
If you're comparing listening comfort and sound character in consumer ANC gear, this breakdown of audio fidelity in noise cancelling headphones is helpful. Just keep the categories separate. Good playback headphones do not automatically mean good call capture.
Placement decides whether the gear helps
Use these settings and positions:
- Boom angle: Aim the mic at the corner of your mouth, not straight in front of your lips.
- Distance: Keep it close enough to favor your voice, without rubbing against skin or catching hard breath blasts.
- Input level: Set gain for normal speech. If callers hear room noise swell every time you pause, the input is probably too hot.
- Desktop mic position: Keep a dynamic mic just off-axis and close. Do not park it behind the keyboard.
- Keyboard and fan direction: Put noisy devices behind the mic's rejection zone when possible, not directly in line with the capsule.
The short version is simple. If your current mic lives in a laptop lid or webcam, moving to a properly positioned boom mic is usually the hardware change that helps the most.
Turning On Echo Cancellation and Noise Suppression
Once the room and mic are in decent shape, the next improvement usually comes from settings people skip. I've seen plenty of users buy better hardware and still sound rough because noise suppression, echo cancellation, or the correct input device was never enabled.
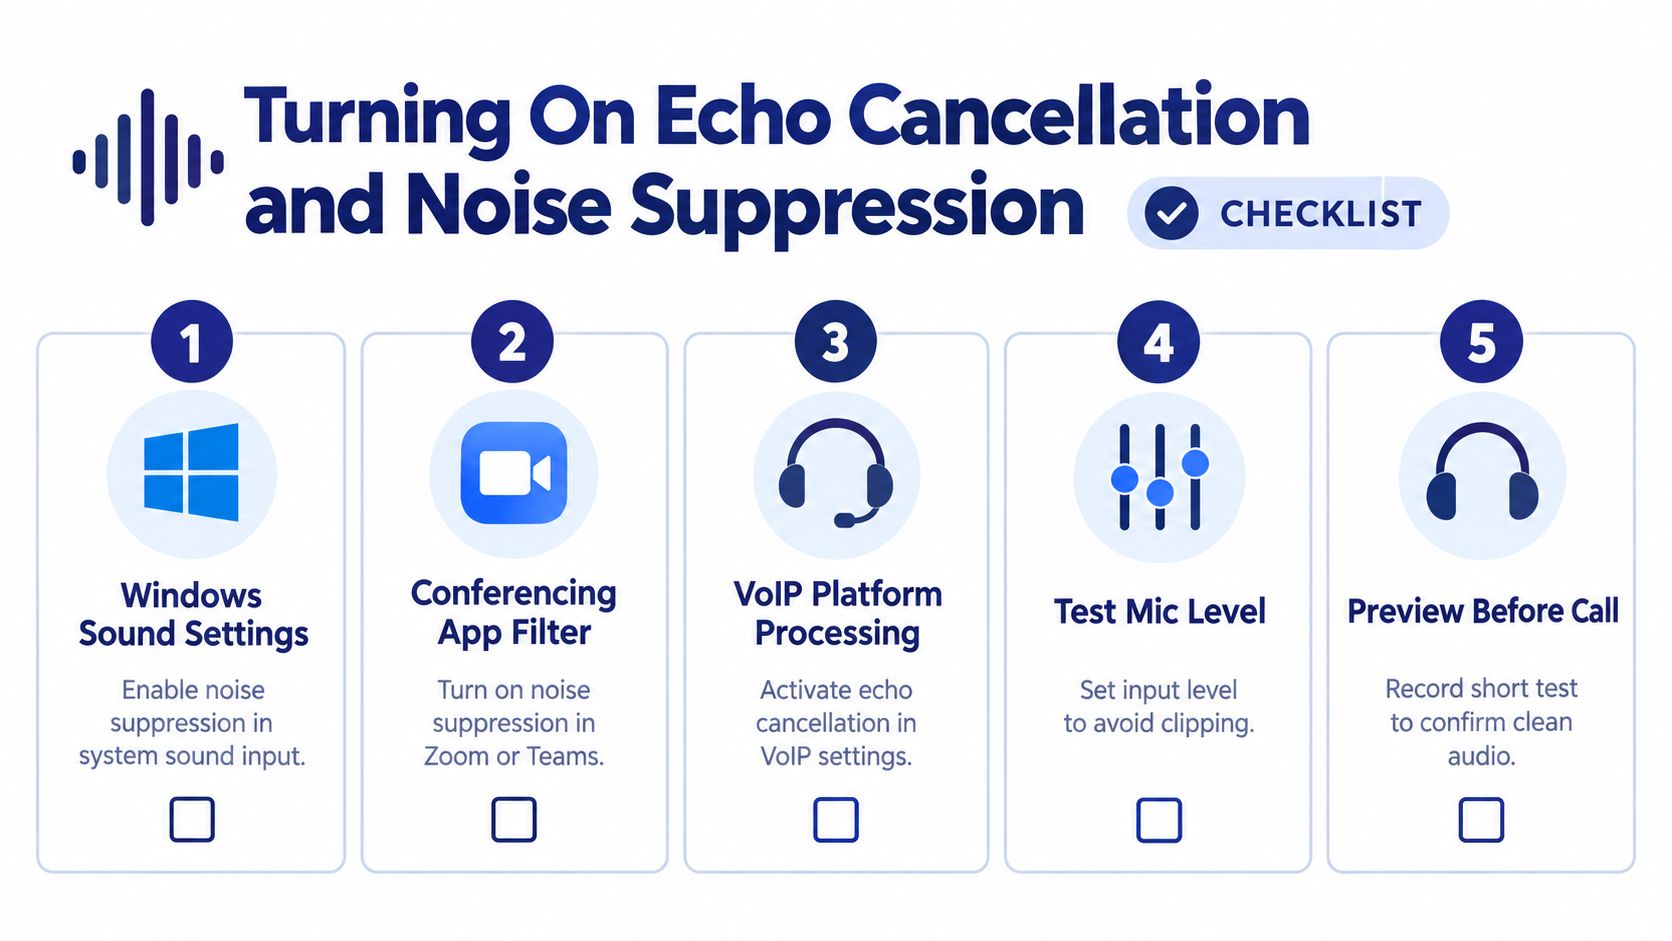
Start with the operating system
On Windows, go to Settings, then System, then Sound, then Input. Select the device you want to use. Open its properties and look for any noise suppression or enhancement options available for that device and driver.
On macOS, keep the intended microphone selected as the active input and avoid routing audio through extra monitor paths unless you need them. If you stack monitoring or enhancement layers carelessly on a Mac, you can end up processing the same signal twice.
Then fix the conferencing app
For the common apps:
- Zoom: In Audio settings, turn on background noise suppression and use the stronger setting if your environment is messy.
- Microsoft Teams: Under Devices, enable noise suppression and choose the higher setting when needed.
- Google Meet: Let Meet's built-in denoiser do its job. Don't pile another aggressive filter on top unless you've tested it.
- Softphones and web calling apps: Double-check the selected input every time you change docks, headsets, or USB ports.
Independent guidance summarized in 2026 coverage points to software noise reduction becoming a first-line fix with real-time use and imperceptible latency, while also stressing that even premium noise-cancelling earbuds remain limited against irregular sounds like children, pets, and doorbells (software and hardware trade-off discussion). That matches what support teams see every day. Software helps a lot. It does not repeal physics.
Don't stack suppressors just because you can. Two mediocre filters usually sound worse than one well-placed one.
Check the VoIP client itself
The last layer is the platform. People forget to look.
In a SnapDial-style softphone or web client, look for audio processing settings tied to the selected device. Many clients expose Noise Reduction and AEC (Acoustic Echo Cancellation) as separate toggles. If your app offers those controls, turn them on for the device you use, then run a quick test call. If you need a deeper walkthrough on the echo side, this guide on removing echo from audio covers the practical checks.
One side note. If you commute or travel and use ANC headphones outside the office, this roundup on which ANC headphones actually silence engine noise is useful for listening comfort. Just keep the distinction clear. ANC in your ears helps you hear better. It does not automatically improve what your microphone sends.
What to avoid
Don't use speakers and an open mic unless you have to. Don't trust “auto” settings blindly if your voice sounds pumpy or clipped. And don't assume a software update preserved your old audio choices. Audio devices switch behind the scenes all the time.
Software Tools Worth Adding to Your Stack
Dedicated noise-reduction tools sit between your microphone and your call app. They can be excellent. They can also make you sound robotic if you stack them carelessly.
The simplest rule is to pick one main suppressor and build around it.
Where each tool fits
Krisp works well for mixed environments because it behaves like a virtual mic and speaker across calling apps. That makes it a practical choice when your team uses several platforms.
NVIDIA RTX Voice is a strong option for people on supported NVIDIA RTX hardware, especially on workstations and higher-end laptops. It's effective, but the hardware requirement narrows who can use it.
Apple Voice Isolation is the easiest answer for Mac-heavy teams that want a no-extra-install option. It's already in the ecosystem, so adoption is simple.
Built-in suppression in Zoom, Teams, and Meet is good enough for many users who will never manage another utility well. I'd rather see someone correctly use one built-in filter than badly configure three layers of “pro” software.
Noise Reduction Software Compared
| Tool | Best For | Platform | Cost |
|---|---|---|---|
| Krisp | Mixed app stacks and cross-platform users | Windows, macOS | Paid plans available |
| NVIDIA RTX Voice | Users with supported NVIDIA RTX systems | Windows | Free |
| Apple Voice Isolation | Mac and Apple device users who want built-in processing | Apple ecosystem | Included |
| Zoom built-in suppression | Zoom-heavy teams | Zoom-supported devices | Included |
| Teams noise suppression | Microsoft 365 environments | Teams-supported devices | Included |
| Google Meet denoiser | Browser-based calling with minimal setup | Meet-supported devices | Included |
My default recommendation
For the cleanest workflow:
- Use a boom mic or solid USB mic.
- Pick one suppression layer.
- Route that processed mic into every call app.
- Disable any duplicate filter that makes your voice sound phasey, muffled, or synthetic.
A lot of people ask whether software is now “good enough” to replace room fixes or better mic placement. Usually, no. It's strong enough to be the first line of defense. It's rarely strong enough to excuse a bad environment.
Quick Troubleshooting When Noise Still Gets Through
If callers still hear noise, stop changing five things at once. Work the stack in order and isolate the failure.
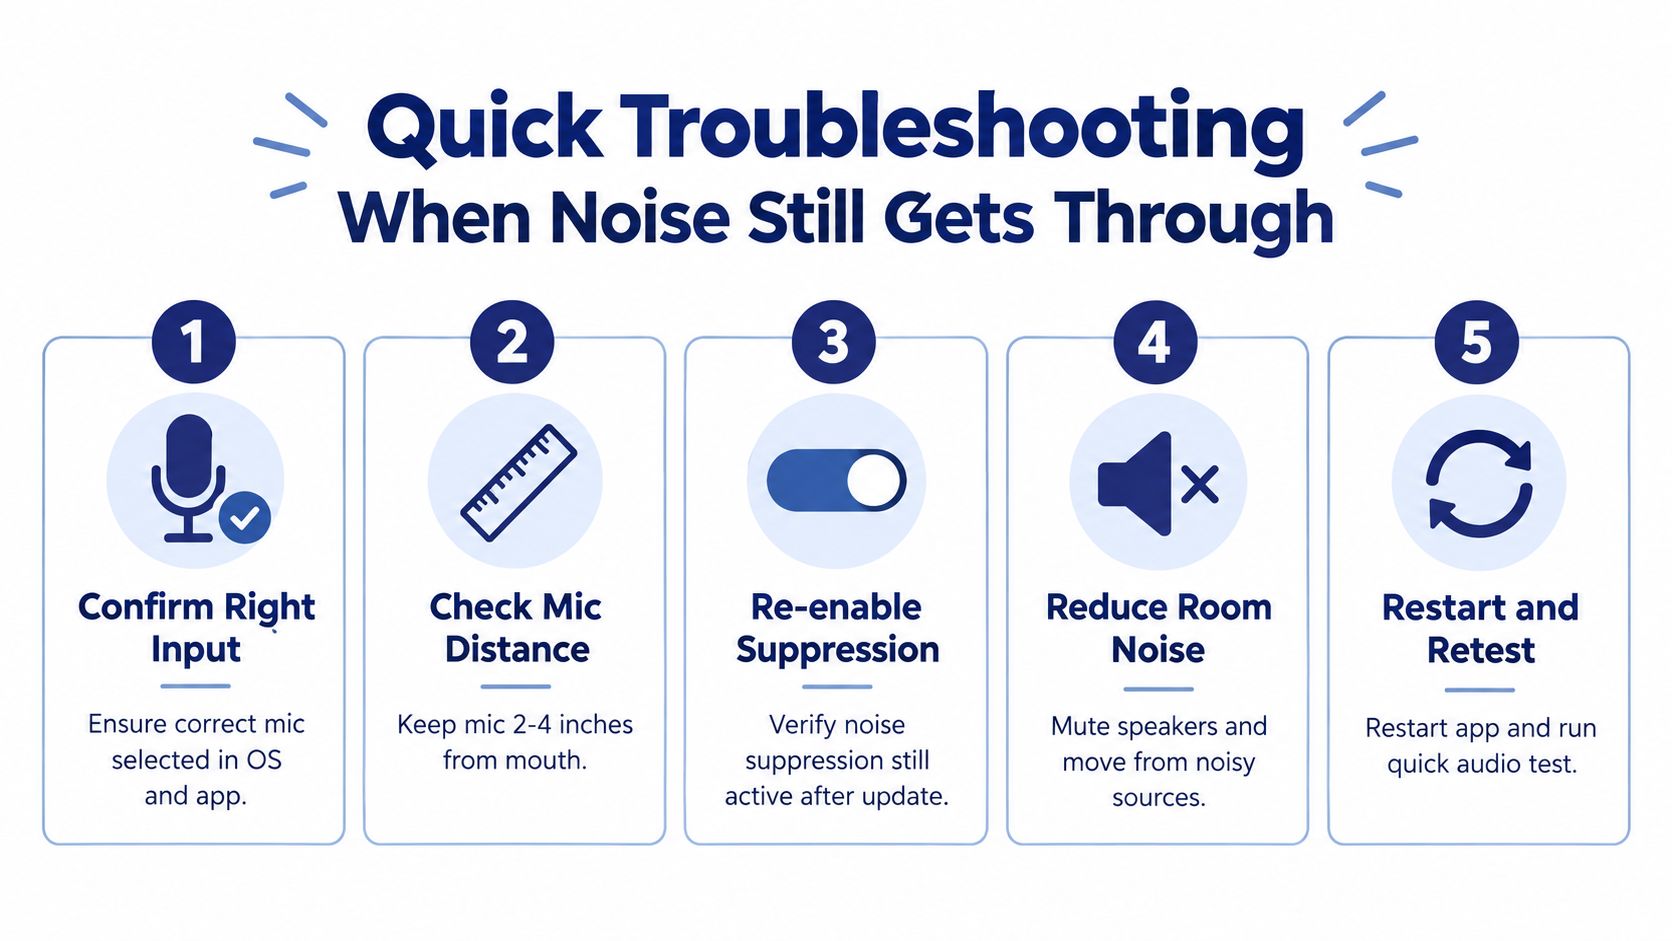
The fast checklist
- Confirm the selected input: The app may have switched back to the laptop mic after a reboot, dock change, or headset reconnect.
- Disable the built-in mic: If the laptop microphone stays available, some apps fall back to it without making that obvious.
- Reconnect the headset: Unplug and reconnect the USB device or dongle. Audio weirdness is often just a flaky handoff.
- Lower gain and move closer: If room noise is overpowering your voice, reduce input level slightly and bring the mic closer.
- Test with a recording or echo check: A short sample tells you whether the problem is in the room or in the software chain.
- Turn off the extra suppressor: Double-processing causes more “why do I sound underwater?” complaints than people expect.
The mindset that saves time
Change one variable, test, and keep notes. That sounds basic, but it's what prevents endless guessing.
If the noise disappears when you disable the laptop mic, the headset was never the problem.
There's also a long history behind why this methodical approach works. Noise control moved from anecdotal concern to measured standards over decades, from early electrical sound measurement work through hearing protection standards, occupational exposure limits, and product labeling rules that made performance claims more consistent (noise-control timeline). In practice, that means the disciplined approach still wins. Measure, isolate, adjust, retest.
Your Four-Layer Noise Reduction Checklist
If you want one framework to keep, keep this one. How to reduce background noise on business calls comes down to four layers that compound when you fix them together.
The quick audit
Room
- Move away from vents, windows, and shared walls
- Add soft surfaces that absorb reflections
- Shut doors and silence nearby alerts
Microphone
- Use a boom mic or a close-positioned desk mic
- Keep the mic aimed at your mouth, not your room
- Treat gain like a precision setting, not a volume knob
Software
- Turn on one good suppression layer
- Avoid running multiple aggressive filters at once
- Retest after app or OS updates
Platform
- Verify the correct input inside the calling app
- Enable echo cancellation and any available audio processing
- Run a short test call before an important meeting
One thing to do today
Mute or disable the laptop's built-in microphone and switch your calls to a headset with a boom mic. If you change only one thing this week, make it that.
One habit to keep
Do a short audio check every quarter, or whenever your team changes devices, workspaces, or calling apps. Small drift causes most “suddenly my calls sound awful” complaints.
Clear audio usually doesn't come from one dramatic upgrade. It comes from fixing two or three boring things that reinforce each other.
SnapDial gives businesses a cloud phone system with calling, conferencing, softphone access, and audio controls that matter when teams work remotely or across offices. If you're trying to clean up call quality without turning every user into their own audio engineer, visit SnapDial and see how it fits into a more reliable calling setup.